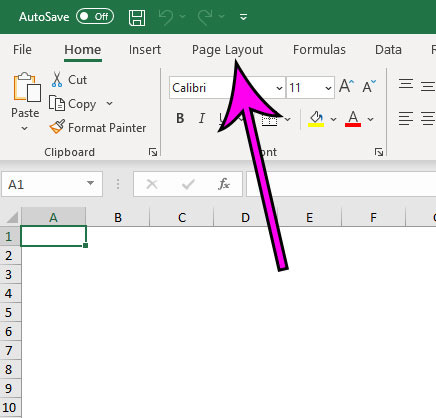
The default layout in Microsoft Excel displays a series of lines that identify rows, columns and cells. These lines, called gridlines, can be a useful way to keep data separate, but you may need to know how to remove gridlines in Excel if it affects your data.
Fortunately there is a simple setting that lets you control those gridlines, both when shown on the screen and when you print your spreadsheet.
Our guide below will show you how to eliminate those gridlines in Excel for Office 365. Master Your Tech has a number of additional Excel guides that can help you use other features and change more settings.
How to Remove Gridlines in Excel for Office 365
- Open your Excel file.
- Click Page Layout.
- Click the boxes under Gridlines.
Our article continues below with additional information and pictures of these steps.
How to Delete Gridlines in Microsoft Excel for Office 365
The steps in this article were performed in the desktop version of the Microsoft Excel for Office 365 application. Earlier versions of Excel have this option as well.
Step 1: Open the Microsoft Excel file containing the gridlines to remove.
Step 2: Click the Page Layout tab at the top of the window.

Step 3: Click the boxes to the left of View and Print under Gridlines to remove the check marks.

If you clear the check mark to the left of “View” then you will remove the gridlines on your screen. If you clear the check mark to the left of “Print” then the gridlines won’t appear when you print your spreadsheet.
You can also remove gridlines from the View tab at the top of the window as well. However, the option on that menu will only let you stop showing the gridlines on your screen. It won’t prevent them from printing.
If you have followed this guide on how to remove gridlines in Excel, but you are still seeing lines on your screen, then you may have added borders to your cells. You can remove borders by selecting the Home tab, clicking the Borders button, then selecting the No Border option.
You can visit Microsoft’s site for additional information on printing spreadsheets.
Find out how to print background colors and images in Word if you are also curious about adjusting some print settings in Microsoft’s document editor.
Matthew Simpson has been creating online tutorial for computers and smartphones since 2010. His work has been read millions of times and helped people to solve a number of various tech problems. His specialties include Windows, iPhones, and Google apps.