The page orientation in Microsoft Word if portrait by default, so you may find yourself wondering how to make a document landscape in Word for Office 365.
The default formatting options and document settings in Microsoft Word include a variety of different items, including the orientation of the document.
While many of the documents you create will need to be in the portrait orientation, it’s common to need a landscape document for a variety of reasons.
Fortunately you can easily switch to landscape in Word by following our steps below.
How to Make a Document Landscape in Word for Office 365
- Open the document.
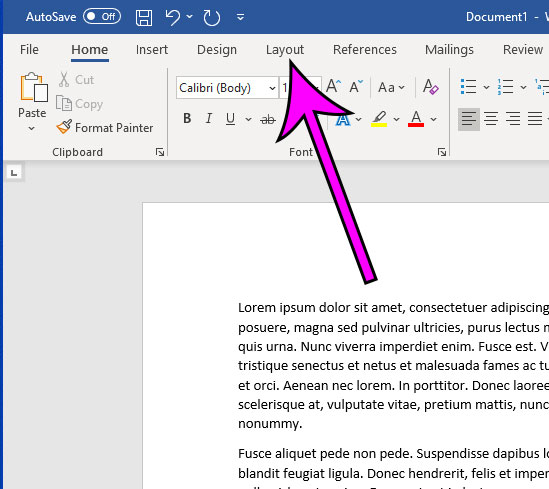
- Click Layout.
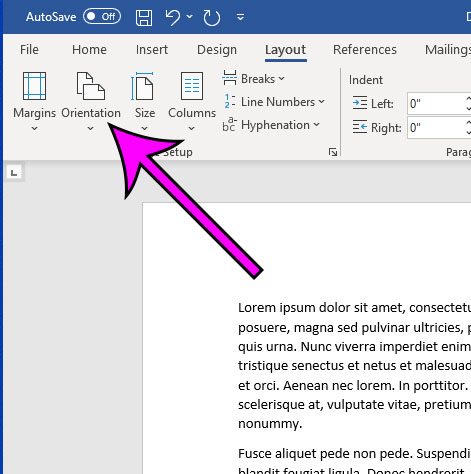
- Select Orientation.
- Choose the Landscape option.
Our guide continues below with additional information on changing the document orientation in Microsoft Word for Office 365, including pictures of these steps.
How to Change Microsoft Word Document Orientation
The steps in this guide were performed in the desktop version of Microsoft Word for Office 365, but will also work in many other desktop versions of Word.
Step 1: Open your document in Word.
Step 2: Select the Layout tab at the top of the window.
Step 3: Click the Orientation button in the Page Setup section at the left side of the ribbon.
Step 4: Choose the Landscape option.
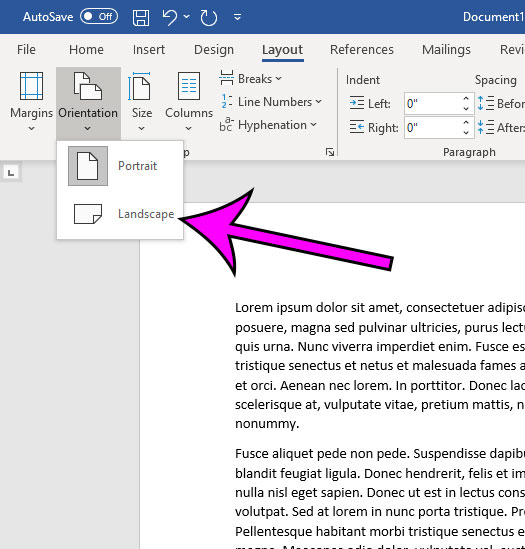
Your document will switch immediately to the landscape orientation.
Note that this change can affect a lot of things in the document, including the page count. If you are changing the orientation in a document that already has a lot of content then you should be sure to re-read the document to confirm that nothing has been moved in a problematic way.
Find out how to print background colors and images in Word if you have them in your document but they aren’t showing up on the printed page.
Matthew Simpson has been creating online tutorial for computers and smartphones since 2010. His work has been read millions of times and helped people to solve a number of various tech problems. His specialties include Windows, iPhones, and Google apps.